Thank you for stopping by and taking the time to look at my creations...I love making memories that I can share with my family and friends....and especially my daughters. They are my inspirations for creating a lot of these layouts. I love taking everyday ordinary things and making them into beautiful altered art. My downfall is buying beautiful papers and not wanting to use them because they are too gorgeous. LOL. Please take the time to check out my crafts, follow my blog and maybe even scraplift them and make sure you let others know where you got the idea...Love to have new followers of my blog.

My crafty creations

Thursday, August 27, 2015

New fence and courtyard garden.

I'm back....I have been pretty busy this summer. From fixing fences with my husband, to revamping kitchen table (also on my blog), to DIY crafts, making layouts, cleaning out closets, redoing my daughters room. Just your everyday stuff. Haha. Since my daughter started back to school yesterday and summer is over for us. I thought I would post the last picture of my summer garden. We did have a fence already up, but the small vinyl fence wasn't holding up due to our neighbors big dogs and no privacy (after they built hottub right next to our house) and dogs always in our faces, so we had to put up a bigger better privacy fence. They say a better fence makes better neighbors, right? LOL. So The first picture is of my fence post being put in. then the rest of pics are the completion of my garden. I love it, so serene and quiet out there now. Now I can enjoy my space and so can the rest of our family.

Revamped Kitchen table

Hello everyone...I am excited to post this. This is my first big big project ever. When I moved into my house about 13 years ago with my husband, my sister gave us this brown farm table. Over time, it has gotten chewed by my dogs, scratched by my kids and just your everyday use. It also has been through about 5 homes now. I was just going to give it away and get something new, but I found Chalky paint and it saved this beautiful farm style table. I used the chalky paint, a lot of sanding, antiquing wax, time and alittle bit of money to make it into a French shabby chic country style table...I totally love how this came out. I added some things from my stash like burlap, greenery with purplish bluish pearl beads. Added some raffia to tie the ends of my burlap, added a tray with rocks and candles. Hope you enjoy as much as I did revamping this.

Happy birthday Dude!

Hi again! This card I made for my nephew for his birthday. He loves anything beachy. So I used Pixar cart for Squirt. He is so turtle cute...LOL. I used LAB for the surfboards and waves (I cut down to size). Added my own poem inside.....hope you enjoy.

Another tshirt made with my cricut

Hello again. This shirt was made for my nephew. He loves fishing and he wanted something with a shark on it. So I did just that. I found all my supplies at the craft store. I used contact paper to cut everything out, used fabric paint, and my creativity. I sprayed with bleach (the tshirt was originally dark blue) Cut the shark out with contact paper and pieced it together. Then added the fabric paint. Let it dry for a few days. Then after the front dried, I did the back with a saying "Chomp my bubbles." the bubble part was a 2 part step. I used white and blue to create the 2 toned effect. any questions please email me. Thank you for stopping by.

A t-shirt made with contact paper

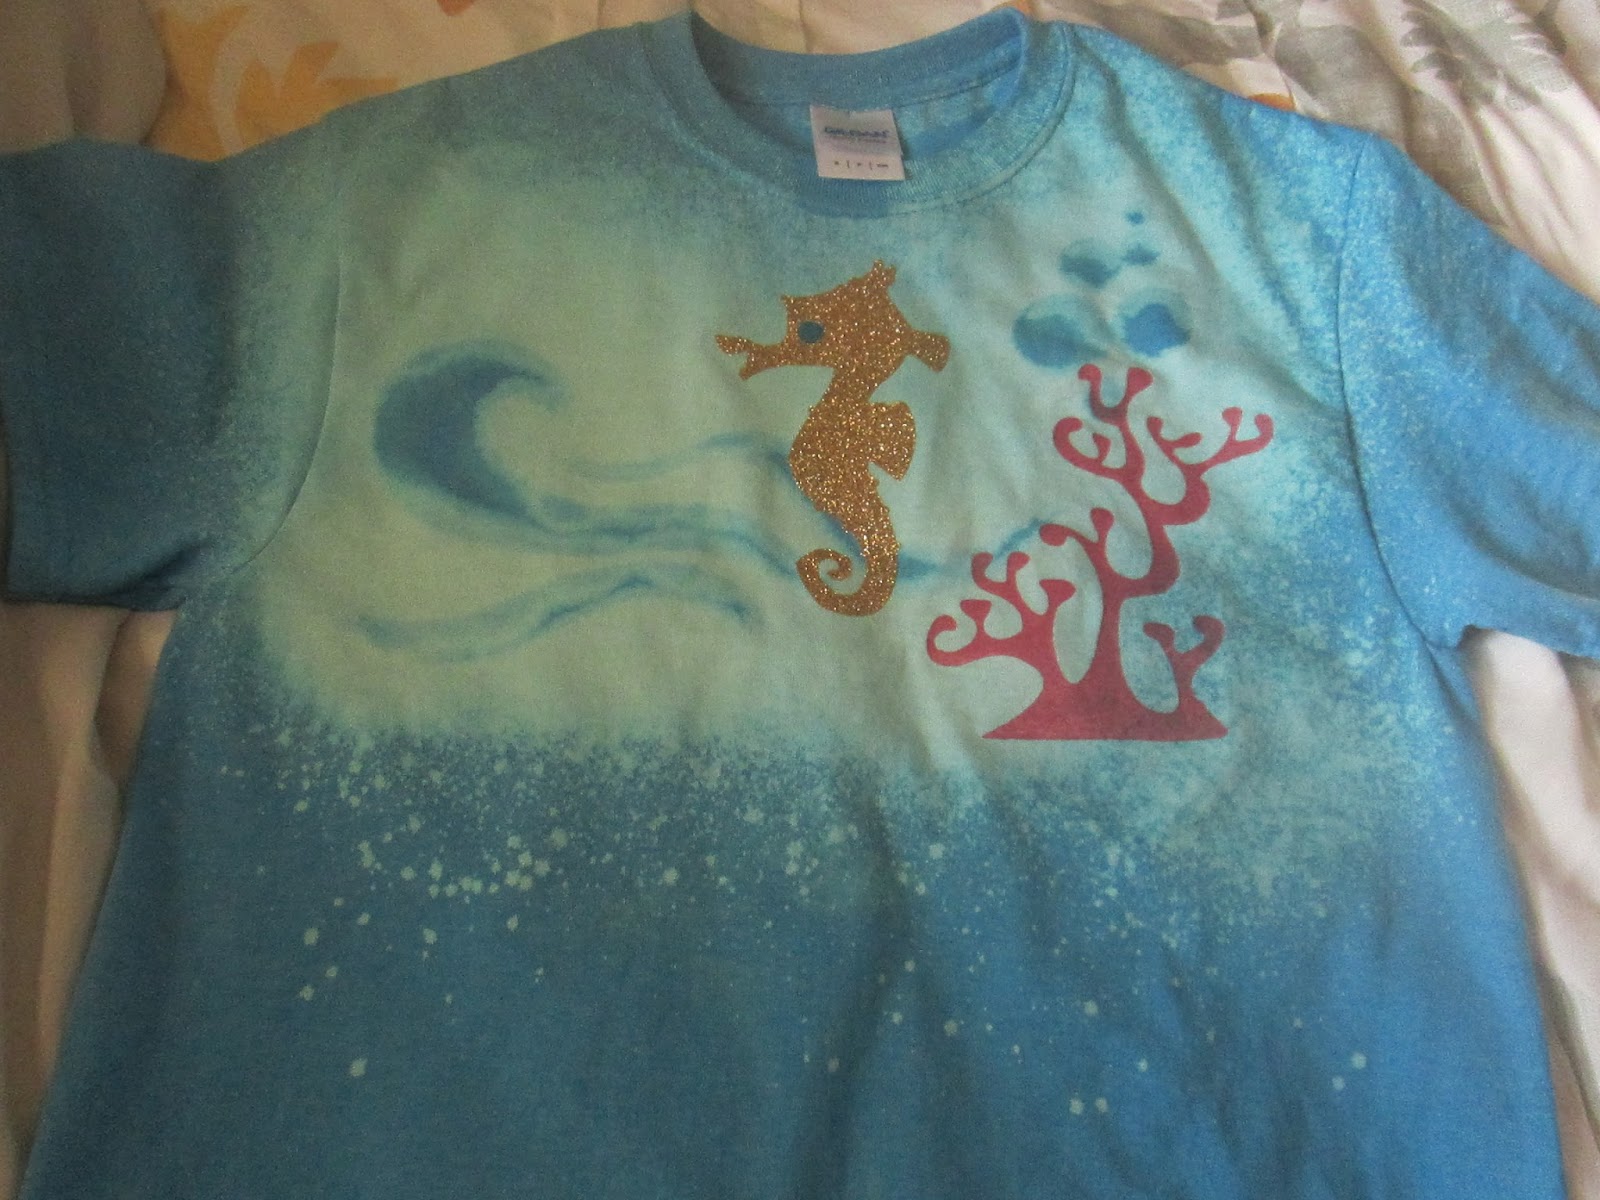
Hello ladies. I was trying to add this last week but something went wrong. My blogger is working today so I will post a couple quick posts. This is a shirt I made for my oldest daughter. She loves seahorses among other things. LOL. I bought the shirt , all the supplies, vinyl, paint, etc at michaels. (or your closest craft store). I cut the images out on my cricut. Then before I added images ...I used bleach to make it look like water effect. I my cricut to cut out on contact paper the coral, bubbles, waves, and the seahorse was made with glitter vinyl. On back of shirt I added the saying " Just keep swimming" Hope you enjoy

Thursday, July 2, 2015

My hero

Another father's day card for my dad. From my husband and myself. card recipe: Fathers day card cut @ 5 1/2" with WC I used Family Phrases sticker pad that I bought at Hobby Lobby (love that place....:) ) Than I used chalk marker that I bought off of HSN, I used silver brads that I used my crop a dile for. (we are memory keepers) Have a great day and make sure you stop back for more.

Shoot "Pop" you're special

Hello again. Here is another Fathers day card but this one is for my dad from my girls. They call him Pop so I thought it would be cute to add that in the card. card recipe: Gun cut @ 5 1/2" with WC # 2 All embellishments cut @ 5 1/2" except for Shoot you're special which was cut @ 4 1/4" with WC # 2 Pop cut @ 1 1/4" with Mickey Font Envelop cut @ 5" with WC # 2 also cut part of star so it would fit. Added white gel pen doodles. Wala a great card from his grandkids. Have a great day.

I is for Incredible Pappy

Another Fathers day card for my FIL ...this one is from my daughters. card recipe: I used Best of Pixar for Incredible 2 cut @ 4 1/2" Trophy card cut @ 5 1/2" with WC#2 Inside cut @ 6" with WC#2 I used chalk marker I bought from HSN Hope you enjoy

Happy Fathers day card

Hello everyone! I have been so busy fixing our new privacy fence with my husband that I forgot to enter my Father's day cards. Here is one I made for my FIL. I hope he found this amusing. card recipe: Father day card cut @ 5 1/2" with WC I used chalk Marker inside to scratch out Farter (OOPS....LOL) I added gold brads and also inside I wrote to the greatest Farter (scratched out) Farther ever! (this one was from my husband and myself) more postings to come

Monday, May 11, 2015

Mothers day card

I made this very simple card using Anna Griffith pretty paintings card set for my mom. Thank you for stopping by.

LinkWithin

Blog Widget by LinkWithin

I WAS FEATURED IN THE CRICUT CHIRP!!!!

My Blog Awards!